Low back pain?
Here is a fast protocol for you from a brain-based perspective. Why do I say brain-based? Because if you’re a movement professional and your first thought for someone with chronic low back pain is core stabilization or their transversus abdominis or things like that, I’m not saying that’s wrong or not useful, but I think sometimes it’s maybe lower in the hierarchy.
What people, I think, misunderstand is that low back pain is not a local tissue problem, particularly when it moves into the chronic stage. Chronic pain, by definition, is a disease itself. It means that changes have happened within the brain and it typically means that we will not be able to get rid of it simply by working on the area that is irritated. We have to think more globally. That’s really what brain-based training is about. It’s looking at all the systems, how pain works and where can we intervene in a way that will reduce the protective aspects of pain.
Because typically what we see with low back pain is not just pain, but also stiffness and maybe they’re stuck in extension or they’re stuck in flexion or they’re antalgic in some way. We need to say, if you have low back pain, here’s a better way. I’m gonna take you through a quick protocol that I’ve used for a lot of people over the years.
Please understand, when I say protocol, I say that with a large degree of hate because I don’t like protocols because people have individualized nervous systems, which means that a protocol is just a starting point. You’re gonna have to test people. You’re gonna have to retest them. You’re gonna have to see what fits and what doesn’t. But the goal here is to maybe expand our professional vision of what we need to be thinking about whenever we’re dealing with someone with chronic low back pain.
Before I get into it, if you are a movement professional of any kind, a doctor, a therapist, a coach, you train people in yoga or Pilates, you are a sports coach, if you are involved in movement and pain in any way and you are interested in bridging biomechanics, kinesiology with modern applied neuroscience, I would love to chat with you. You can go to the pinned comment. You can send us an email, set up a phone call and see if what we do is a good fit for helping you move to your next stage professionally.
All right, now let’s talk about low back pain and our first starting point, typically someone with pain is we need to reduce the overall threat state. What’s the fastest way that we know to do that? I’m gonna use that later, that’s why I was there. Anyway, the fastest way that we know to reduce that overall threat state is breathing. We need to focus on some type of breathing process that will reduce sympathetic tone.
From the research and from experience, the fastest way that we can approach that is to do exhalation-focused breathing. Now, you may have heard lots of different numbers thrown around. We’re gonna have you breathe in for three seconds, hold for four seconds, breathe out for six seconds. Here’s the point I want to make here. The exhalation focus is useful. In most cases, if we have a 1.5 to 2 to 2.5 or even three times longer exhalation than the inhalation, we will see people begin to relax over three to four minutes but hear that clearly. Whenever we say, hey, we need to do some state regulation, we wanna reduce your overall protective mechanisms, that means we’re gonna have to have them laying there, standing there, sitting there, whatever it is, breathing for three to four minutes. A longer exhale is the key.
Why do I say the longer exhale and not a specific time? Well, because if they have really crappy breathing mechanics and you say, I want you to do three seconds in, a four-second hold, and a six-second exhale, and they freak out because they’re three seconds into the inhale and two seconds then into the hold, and they start to feel out of breath before they even begin exhaling, well, then trying to hit that six to eight seconds is actually gonna ramp up their sympathetic nervous system, scare them neurologically, so to speak, and it’s gonna ramp up protective mechanisms rather than lower them.
So you have to be an actual coach and watch them and say, okay, all that I want you to do, take a breath in and I want you to do a long exhale. That’s how you start. Then if they have already been practicing some breathing stuff, then you can get in a little bit more specific, but at the end of the day, we want a longer exhale than anything else. On the exhale, you’re also asking them to relax. So three to four minutes, exhalation-focused breathing, don’t scare them, don’t give them a specific timeframe, don’t freak them out, just help them to relax.
Once we’ve done that, we then want to go to the upper cervical spine. Why the upper cervical spine? Often, low back pain and low back tension is a result of the brain’s desire to stabilize the visual field and vestibular input.
That typically will occur when there is some type of tone problem or stability problem in the upper cervical spine. So we’re gonna make the brain more aware of the upper cervical spine immediately. The way we’re gonna do that is just with a very small upper cervical nodding exercise. We’re gonna think about the suboccipital muscles, these guys right here, and that we need to put them under a little bit of load. These particular muscles are completely filled with mechanoreceptors, nerve endings that your brain’s gonna use. So there’s a super high density there. So we need to move that area very precisely in order to clear up the brain’s map of the upper cervical spine. We’re gonna use that, particularly when we go into dealing with the eyes and the inner ear.
So the exercise is super simple. It takes less time than the explanation. Get nice and tall, tuck your chin. If you want to palpate, palpate the upper cervical spine, particularly the suboccipital muscles. And you’re just going to be doing a very small upper cervical nod, back to neutral. For people with chronic low back pain, this is often very hard. They will often feel tension more on one side than the other. So you’re gonna do 10 to 15 repetitions in neutral. You’re then going to turn the head slightly and repeat. And then you’re going to go to the opposite side and repeat. The reason we’re doing that is we’re able to focus more on the right side or left side suboccipitals and give a little bit more mobilization there.
As soon as you are done with that, you can have them gently retest whatever is uncomfortable for them. If that’s gait, if that’s going from seated to standing, if that is rotation, if that is forward flexion, don’t let them go crazy. Just say, hey, let’s see, did this improve you a few degrees range of motion or did it drop your pain level at all? So we start with upper cervical spine after the breathing. So we’ve reduced our sympathetic tone with breathing. We’ve made the brain more aware of the upper cervical spine with some mobilizations.
Now we need to work with the eyes and the inner ear. Why? Because once again, lumbar spine is very reactive. If I have problems with my visual system or my inner ear, one of the easiest ways for the brain to induce protective mechanisms in the body is to create tension in the low back or stiffness. That stiffness held long enough can then begin to turn, become nociceptive and eventually become painful. So whenever we say, okay, where should I start in terms of dealing with the eyes? There’s so many different assessments for the eyes, saccade, smooth pursuits, convergence, divergence. I’m gonna recommend that you actually start with convergence and divergence in this particular case.
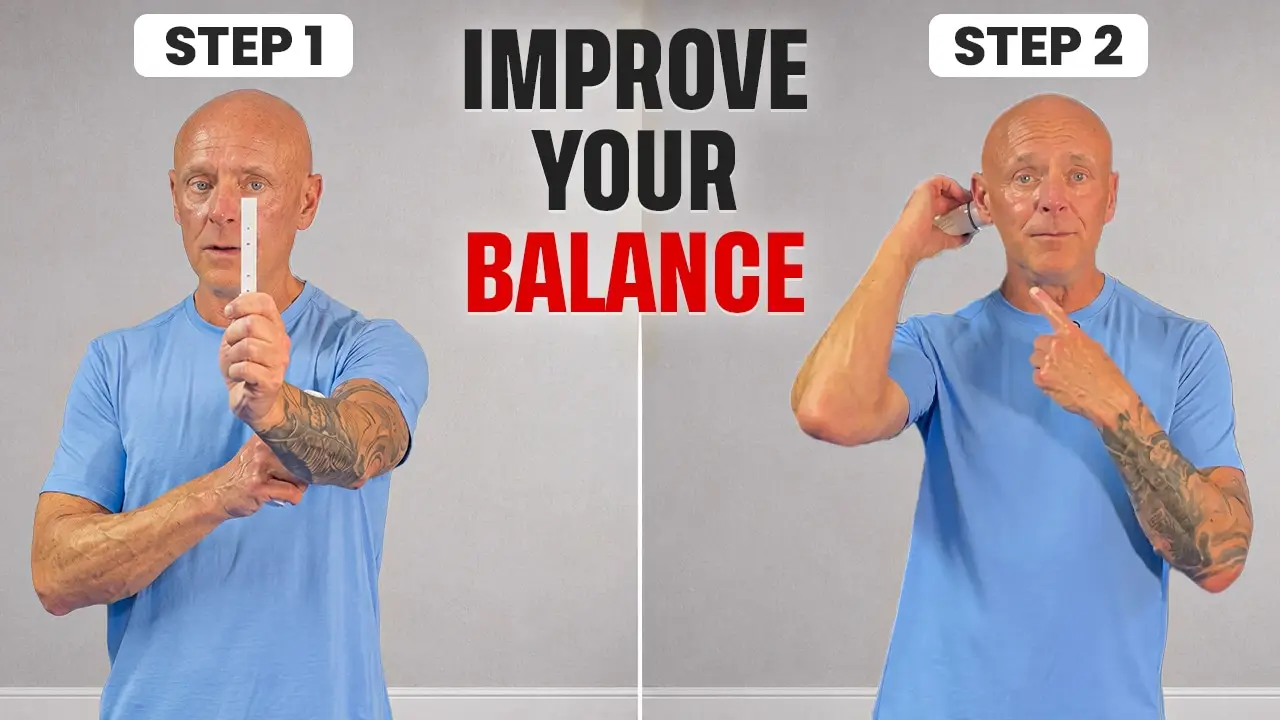
In a person with low back pain, I typically will have them seated while doing this or have them holding onto the wall or something because I don’t want instability to come into play. But the basic idea is we’re gonna perform a pencil pushup. A pencil pushup is a really simple exercise. You can see on my little, we call saccade pencils here. I’ve got a letter. I’m gonna take the pencil out to arm’s length. I’m gonna focus on one letter and then I’m gonna bring it in toward my nose. Now, if you don’t have one of these cool pencils, you can use your finger, you can use a pen, it doesn’t really matter because what we’re trying to do is we’re trying to bring this in as far as we comfortably can until the image that we’re looking at splits into two. Now, if you have well-trained eyes, and from our perspective, be able to bring this all the way to your nose without having the image split into two. But a lot of people with low back pain, when you test them, it’s gonna look like this. You’re gonna say, okay, I want you to go ahead and bring this in close to your nose, but I want you to stop when the image or the pen or pencil or whatever splits into two images. And they will come to about here and they’ll go, whoop, now I see two. And then they’ll push it back out and they’ll get kind of weird and you’ll see them doing stuff like this with their body. This is a poor, what’s called near point of convergence.
One of the issues with this is that the area of the brain responsible for helping our eyes converge also influences flexor and extensor activity in the body. It also is one of the primary areas where antinociceptive pathways begin. Antinociceptive means that these are anti-pain pathways. So when the eyes aren’t working well, very often we will see a diminished ability in many people to decrease pain centrally. So we start off, like I said, with this pencil pushup and this is something that they can learn to do, right? They just begin working on it more and more. What you’ll see if you’re coaching them, you watch both eyes, you’ll often see one eye that comes in and the other one doesn’t. Or you’ll see both eyes come in asymmetrically and they will have a hard time holding the position. And you may even see this. Both eyes come in and one eye does this. Bing! It completely leaves the exercise.
So depending on what you’re seeing, you can also then have them practice this, one eye and then the other, all right? So again, this is more like an isometric exercise. We bring it in as close as we can. We hold for five to six seconds and then we push it back out, all right? So often, like I said, in people that have low back pain, flexion is problematic. Convergence typically enhances overall flexion capacity. So that’s the reason that we’re starting with that in our low back pain population.
Now, if they have more pain in extension, the opposite is true. We need their eyes to maybe diverge more. Maybe they spend 12 to 15 hours a day right here on their phone. And they never look in the distance. So we can use the same exercise and then we add a piece to it where we’re going to say, okay, bring it in right before it starts to split into two. Hold for five seconds. And then you’ve given them a target in the distance, maybe 15, 20 feet away. And they quickly switch their eyes to that target and then back and back and back and back and back. So we go near, far, near, far, near, far, near, far. The goal there is to tell them you only make this transition back to the other target when the visual picture is as clear as you can make it. So in some cases, particularly people with low back pain, you’ll see them go, okay, switch to the far target. And it may be five or six seconds before that target becomes clear. And then they switch back to this one. And once again, like you’re having a coffee while you’re waiting for their eyes to adjust.
That’s a problem because that means as they’re going through the day, their visual system is disturbed enough that looking at their phone, looking up where they’re going is creating tension. And so we actually have to test them and then we have to teach them what to do about it. So after you’ve done that, once again, you’re gonna go back, retest whatever it is that’s been bothering them. Flexion, extension, lateral flexion, rotation. See if that made a difference.
So now we’ve done breathing. We have worked on the upper cervical spine to try and set the stage for the eye movements that we’re gonna do to be more effective and long lasting. Next, we have to look at the inner ear. Now the inner ear, super complicated neurology. We can get into it. We spend hours and hours and hours and hours on this in our certifications. But here’s the really simple thing that you can start with, which is just called a VOR exercise. VOR one and two. These are basically stimulating the vestibulo-ocular reflex.
The way that you’re gonna do it is you’re gonna have them hold a target with a clear image. This is not ideal for me. I don’t like to have people necessarily do this with their thumb. You can, but I actually like to use a letter of some kind. Like get your phone out, make a letter that they can see. Because the idea is that I’m gonna have the target basically at arm’s length. I’m gonna have that slight tuck to my upper cervical spine. And then I’m gonna be moving my head back and forth while I am watching that image, right? So if I’m looking at the letter K here, I’m going like this.
Now, my eyes should not be moving, but my head is moving. This is the basics of what the vestibulo-ocular reflex does. You can see right now, I’m moving really slowly. The reason that I’m moving very slowly is that a lot of your people with low back pain are going to find this quite challenging. They’ll start doing it. They’ll be like, ooh, I’m maybe losing my balance. Maybe they start to feel a little dizzy. So this is one of the exercises that you may need to have people seated. And if they are not seated, you may need to hold onto them or have them hold onto a wall as they’re doing this. Because ultimately, we need to challenge them a little bit because if they can do this and it’s okay, eventually we need to be working at a relatively fast tempo. And the goal is to keep the image clear, right? That’s the whole point.
For this particular iteration on YouTube, I’m just gonna show you the right and left rotation. And then we’re also gonna do a nod. So we’re gonna look up and down, all right? Notice as I’m doing this, I’m not doing some kind of huge motion with my head and neck. This is more upper cervical spine, right? But once again, I’m doing the same thing. My eyes are staying fixated on the target while my head is moving, all right? So eyes are still, head moves. We’re gonna do that in rotation, flexion, extension. I would recommend that after you do the rotation, stop, test their low back. After you do flexion extension, stop, test their low back. Don’t assume that they need both.
What you’ll often find in people with vestibular issues is that one line of movement is very effective for them and the other one makes them feel worse. Happens all the time. So make sure that you’re dividing those up.
Finally, once you’ve done all of that, hopefully at this point, you’re feeling something different, right? Your low back’s feeling a little bit better. Pain’s gone down a little bit. You have more range of motion. Then we’re gonna cap all this by adding in a little bit of isometric strength work.
Isometric exercise done properly is incredibly powerful and useful for diminishing pain. The problem is that most people, whenever they are gonna use isometrics, they tend to think of the old school isometrics, which is I’m gonna pull as hard as I can for six to 10 seconds. That’s good for some things, but that’s completely inappropriate for people who are in pain. What the research indicates is that we need to use extensive long hold isometrics in order to create pain relief. What I have personally found over many, many years of doing this is that most of our clients with low back pain, the number one movement that we need to restore for them, honestly, is not flexion or extension or rotation. What changes them the most, the fastest is restoring lateral bending, right? There are a lot of mechanical reasons and also neurologic reasons for that.
So what we’re gonna do is we’re gonna do a long hold isometric for a lateral bend. Now, the way that I normally do this with people who are in pain, we have to pick the range of motion, right? In other words, we need to have a lengthened muscle when we’re doing the isometric. So in this particular case, I’m bending left, so I’m gonna be working on my right side as I try to straighten back up.
The easiest way to figure out how far to do this with someone who has back pain is to say, okay, if your full range of motion is this, which it probably won’t be, we’re gonna call that a five. Here is a one. So I have one, I have two, I have three, I have four, and I have five. Those are my available ranges of motion. For most people with low back pain, I’m gonna have them work at two, all right?
So I’m gonna get into position. And like I said, for me, so one, so this would be my two right there. Now I have to adjust my strap, but once I’m here, I’m now gonna hold onto the strap and I’m gonna begin trying to straighten up. And I’m just trying to straighten up by laterally bending. You should feel it really intensely on the other side, but I’m not doing 100% isometric. In fact, this is gonna be somewhere around 15 to 30% of as hard as I can pull, why? Because we’re gonna hold this for roughly 90 seconds to three minutes. There’s actually some research that says holding it for five minutes is maybe even better. So we will aim for most people in the beginning for around 90 seconds. If they’re able to keep going at that point, then we’re just gonna keep them there and we will work up to three to five minutes.
There’s something that’s kind of magical once you hit that extended duration in terms of reduction in pain and also a restoration of movement confidence. So in some of the questions always come up is, well, do I work the left side or the right side? My only answer right now, because I don’t know who you are or who you’re working with is you have to test it. I will typically do a short test of maybe 10 to 15 seconds and then release the isometric strap, have them move around, see if that improves them. And then I will test the other side. There’s actually a lot of ways to do that in a more advanced way, but right now that’s the easiest thing I can explain for you to do.
In a lot of cases, you’re gonna wanna do it bilaterally. So you’re now talking maybe six minutes to seven minutes of isometrics. I would not recommend starting with that. You begin the way that I described. You begin with your breathing, right? If you reduce the overall tone with long hale exhalations and then you go to the upper cervical spine to help stabilize it. Once you’ve stabilized the upper cervical spine, you work on convergence and divergence for the eyes. Then we stimulate the vestibular system. Finally, when all that is set up and in place, then we’re able to do some long hold, long duration isometrics. That is a magical combination for a lot of people for beginning the rehabilitation, particularly for chronic low back pain.
So hopefully this makes sense to you. I hope that you enjoyed it. This is a, again, just a protocol I was asked to put on YouTube. As I’ve said, I hate protocols, honestly, because people are so individualized, but this offers a starting point for kind of a brain-based approach to saying, okay, if someone has a chronic issue, what do I do? Well, not more core stability, not more TVA activation, and probably not a lot more mobilization manipulation, because they’ve probably already done that.
One of my biggest frustrations in all practice is having people go from one practitioner to the next to the next, doing pretty much the same thing. And I guess the assumption by every practitioner is that they’re just better at it than everyone else. That’s weird. If people have already done months of therapy, stop doing that and do something different, do something better, because it hasn’t worked for them by definition. That’s why brain-based training takes such a broad view, a systems view, and looks at everything, all right? So good luck with this. I hope it’s very useful for you. If you are a movement professional, again, you find this kind of stuff interesting, go to the pinned comment, email us, set up a call. We’d love to chat with you. Otherwise, good luck, and I hope this is very helpful for you.